Tuesday, April 30, 2013

Covert!

I recently participated in a super-secret crafting mission.  It started off so secretly even I didn't know what I was going to make or for whom I would be making it.  The mystery mission was hosted by Rachael at www.imaginegnats.com (and ten other loverly bloggers).  It went something like this: sign up, get an email with a name/address and hopefully a blog link, stalk blog in a totally non-creepy-purely-professional way, make a gift for said person, mail it, hope they like it.

I was matched with Tabitha from http://www.kluckingbear.blogspot.com/ so I began my research.  She seems to do a lot of journaling and paper crafting, crocheting, takes Halloween to a level Martha would be proud of and wins a lot of on-line give-aways.  All neat info but nothing that gave me that magic AHA moment.  Well the clock started ticking and I knew I couldn't obsess on the 'perfect' idea any longer so I decided to make her this:


I'd just made myself one recently in fabrics that match my craft room and I really wanted to use the last bit of that blue/bird/forest fabric.  I figured if she didn't sew much she could use the pockets and basket for crochet?  I also grant her permission to regift! 

What I haven't mentioned yet is I too was a name/address/blog link sent to someone else so they could make ME a giftie!  Yay!  I'll post pictures of what I got soon!

(And I meant to use the birdie fabric sideways...ok....I totally didn't and my inner perfectionist is woozy just looking at it but I didn't have any more fabric to recut it and do it correctly.  Let's just file it under 'creative license' shall we?)

=^..^=


Saturday, April 21, 2012

A Ton of Love

When I last posted, I thought I would be making caps and bags for children with cancer.  Children I didn't know, wouldn't know, but children who may be helped or cheered in some small way by the items I sewed.  But life took a very unexpected turn.  One of my best friend's 5 year old daughter was diagnosed with an inoperable brain stem tumor.   Five days later the beautiful, smart, kind and happy little girl, Madeline Elizabeth Musto, became an angel.  

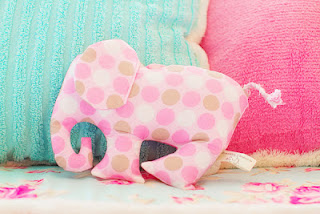
Amid the shock and sorrow, the grieving and disbelieving, the support for Maddie's family was amazing.  People locally and from literally across the world who heard of the family's story reached out.  It was like a herd of elephants coming together as a family.  And it was that keen observation by my friend H that was the start of Maddie's Elephants.  She had the idea of sewing stuffed elephants that might help children by having something to cuddle when they were sad or confused.  Elephants would represent the togetherness we all feel in our sorrow and be a tangible way to celebrate Maddie and support her family.  At the start, a goal of making and selling 300 elephants seemed unlikely, but possible and worth pursuing.  

H put together a 'sewing bee' of sorts at her church and with three of us sewing as others cut and pinned, we had about 42 elephants ready to stuff and sell by the day's end.  The following day, we launched a web site that was hastily though expertly pulled together with a great deal of help from my husband.   That was Sunday at about 9PM...by Monday morning we had 51 orders.  On Monday we received another 70 orders!  Orders came in faster than we could sew and stuff and we again saw the kindness and beauty of people coming together to help each other.  Friends who didn't know how to sew helped turn the sewn elephants, helped stuff and helped with donations of fabric and batting.  

Photo Courtesy Kidography by Dania

Over 600 elephants have been sold online, at benefit events and through word of mouth.  Elephants are now keeping Maddie's memory alive in 30 states, over 100 cities/towns and at least 4 countries!  And so while I did end up sewing because of childhood cancer, it was for a beautiful little girl I did know.  I feel privileged to be a part of the Musto's lives and to be able to contribute to "the best day evers" that will come from the Maddie's Mark Foundation.  Please visit the foundation's web page to learn more.  

If you too would like to be a part of "the herd" you can order your own Maddie's Elephant at www.maddieselephants.com and be sure to "like" Maddie's Elephants on Facebook.


Friday, April 20, 2012

Hello folks I'm so happy to be guest posting here in Melissa's world!  I'm Wendi from SewCatSew Creations.  I love to sew (did the name give me away?), craft, design and drink tea to excess.  I do a lot of hand sewing with felt, but also enjoy machine sewing for charity projects and home decor adventures.  Do stop by my space and say "hi"!  But now, let's get to the project I have for you...Quick 'n' Easy Boot Fillers.


I use these to store my good boots over the winter, but also between day-to-day wearings to keep them from drooping and wrinkling.  They take less than an hour to make and only require a few supplies that you likely have on hand.

For today's tutorial I used a piece of flannel that I bought on a whim from the remnant bin, bamboo batting, a piece of ribbon and basic sewing supplies.


First cut out 2 rectangles 22 inches by 10 inches from your fabric.  Fold each length-wise, right sides together and pin.


Next you'll sew along one 'short' end and along the long side across from the fold leaving one 'short' end open.  I used a 1/2 inch seam allowance, but precision is not important in this project (bonus!).  Repeat for your other piece of fabric.


Now, turn both rectangles right side out so you have a sort of long, skinny pillow case.


Next up is the batting - I simply rolled out a "log" of batting to the approximate size of my case and cut it off the roll.  I didn't even unfold it from it's original shape out of the package.  Easy peasy!


Stuff the batting into the case.  If you find it's a bit bigger than you need, simply unroll and roll tighter and smaller.  If you didn't get enough from you first cut, just wrap another thickness around to enlarge.  Once the tubes are stuffed, all you need to do is finish them.  I like to pull the bottom sewn corners together and tack them with a few hand stitches for a neater look, but if you're just interested in function, you can skip this step.


To finish the open end, roll the raw edges down into the tube until they meet the batting.


Next, take about 15 inches of your ribbon and tie a nice tight knot and bow around the 'neck' right at the top of the batting.


And that's it you're done!  Slide your new fillers into your boots bow side up and smile at how tall and proud your slumpy boots stand and how easy it was to give them a pick-me-up!

I hope you enjoyed this quick and useful project.  Thank you again for inviting me to your blog, Melissa!   Have a great weekend everyone!


Wednesday, February 1, 2012

The Littlest Warriors: Craft hope Project 16

Craft Hope is back in 2012 with Project 16: The Littlest Warriors.  If you are not familiar with this great organization take a few minutes to look over the past projects on their site and get inspired!

This time around they are collecting handmade beanies/hats and tote bags for children who are fighting cancer.  The beanies can be any style in any size from baby to teenager and the bags can be filled with activity goodies too (ie. books, crayons, puzzles etc.)  The possibilities are endless!  I'm so excited about this new project and am working on some ways to involve more people whether they sew or not!    Here are several ideas for joining in:
  • DIY!  If you sew, knit or crochet grab a pattern online or from your stash and get to work!  I've collected several ideas and patterns on one of my Pin boards.
  • Learn to sew, or knit, or crochet.  If you aren't already crafty in one of these areas there are oodles of tutorials available online and surely a friend or relative can get you started?  
  • Join me and my local friends to sew/knit/crochet in person.  Bring your talent or come to learn.  Dates for a bag sewing night and a beanie/bag session are in the works for this month.  Email me if you are interested in being on the notification list for either or both.
  • Contribute supplies - do you have a stash of stuff you meant to get around to using but never did?  Use it or share it with someone who can turn it into a great gift for the kids.
  • Don't sew, don't knit, don't crochet, don't want to learn?  You can contribute 'fillers' for the tote bags or donate good old fashioned money at the Craft Hope site.
  • Spread the word!  Let your crafty (or non-crafty) friends and family members know about this great project and how they can join in too.
I'll be glad to gather the completed items to pack up and mail as a big box of love from upstate New York.  Please don't hesitate to contact me with any questions, ideas or to participate in person or virtually.

If you do create something on your own, please comment below!

Pin It

Monday, January 23, 2012

DIY Cleaners

A couple of years ago, B.P. (before Pinterest), I happened to notice a lot of people saying they'd made their own laundry soap. I thought that sounded crafty in a way so I gave it a try and posted a tutorial at myfirst blog site Yay For Mommy!  Click over and take a peek.

Since then I've tried various ways to minimize the chemicals I use around the house with varying results.  I haven't been impressed with the old science experiment drain cleaner (you know, baking soda and vinegar combo that is also a 'bubbling volcano' if you're in grade school).  I like vinegar for it's naturalness, but it's smell, eh notsomuch.  I have a small hand held steamer that does a nice job but I usually have the perception it's a big hassle to drag it out.  My floor steamer is nice and makes me feel like I'm really cleaning the (hardwood) floors not just wetting the dust and spreading it around more evenly.

Since Pinterest has come into my life, the ideas for decorating, organizing, crafting, cleaning etc etc etc knows no bounds.  I wish I could say that about my available time to try everything I pin.  I did just try a recent cleaning pin that I've been seeing over and over.  Perhaps you've see it too?  Have you tried it?  Well I did and here's my take on it.

Simple. Dawn liquid, vinegar, spray bottle.  Three ingredients...if you count the spray bottle you need to mix it in, so it definitely has simple covered.

Inexpensive, relatively speaking, though Dawn liquid is far from the cheapest dish soap around.  Someone's instructions said it HAS to be the blue Dawn so I didn't dare try another type or brand.  I suppose I could have just compared ingredients, though. 

Easy.  Heat 12 ounces of white vinegar in the microwave.  Pour into spray bottle.  Add 12 ounces of Dawn ...uh BLUE Dawn dishwashing liquid.   Mix.  Use.

Effective?  Yah I thought it did a really good job.  Not unlike a movie that gets overhyped, I was expecting a LOT from this combo that everyone is raving about.  Not unlike a movie that gets overhyped I was probably expecting too much.  But objectively, I thought it worked really well.  I cleaned two bathroom sinks, a tub, a shower stall, the kitchen (stainless steel) sink, the glass stove cooktop, and the glass oven door.  It didn't do much for the oven door but the rest of the places I mentioned sparkle.

Miracle cleaner?   I like that it's not overly chemically.  As in vinegar is natural and Dawn is at least made to be used on your food serving items.  It does leave a nice shine.  On the down side, I hate the way it smells.  I'm weirdly sensitive to fragrance and dislike Dawn's fragrance.  A lot.  I've also got to learn how much is enough because I ended up with oodles of soapiness I had to rinse away.  I suspect being a bit less trigger-happy would manage that.  It's only a miracle if one use keeps everything clean forever, though.

So I rate it a solid A-.  I don't think I should hold it's smell against it and come spring when the windows can be opened I may even learn to like it.  I definitely suggest you try it - especially if you already have the ingredients on hand.  Then when someone says they tried this new cleaner from Pinterest you can brag or complain about it too!  Oh and of course you can clean with it as well.

Follow Me on Pinterest

Pin It

Thursday, January 5, 2012

A Hodge Podge of Mod Podge

I do think Mod Podge (often mispronounced Modge Podge) is a pretty cool product. I have discovered, however, that it challenges my inner perfectionist. I can't seem to force it to be perfect and it doesn't give me a "do-over" like I get with a stitch. Anyhow, I have friends who are mad-about-Mod-Podge and I DO like so many of the things made with it, so I've been dabbling. This past Thanksgiving I threw together a wooden sign with a scrap piece of plywood I found in the yard. Really, I just kinda took scrapbook paper and winged it. Here's what I ended up with...


Once it was up on the wall and I couldn't inspect it so closely I came to like it.

I also made a family sign for my sister for a Christmas gift; the top board has hooks on the bottom to hang a seasonal plaque below.  Here's the one I did for 'summer'. 


Winter was four penguins, spring was four bunnies and fall was four pumpkins so there is a family 'picture' to change with each of the New England season changes.

The other Mod Podge project I did is my favorite of the bunch.  I followed this Paint Stick Ornament tutorial that looked like a fun little giftie/decoration idea and added some embellishments of my own.


It's important to always have teeny tiny jungle bells on hand!


So there's a sampling of my Mod Podging.  I'm thinking about birthday countdown cubes next....well after I cross off some house projects, and cleaning projects, and sewing projects...<sigh> the list never ends!

Wednesday, December 28, 2011

Hoop La

Traditions are one of the best parts of Christmas (well unless we're talking about re-gifting fruit cake perhaps). One of my favorites is the now three year old ornament exchange among my friends. About a dozen of us gals gather together for holiday cheer (aka wine and yummies) and jibber jabber until we gather around the tree to share a little summary of our year and distribute one of our homemade ornaments to each friend. Similar to a cookie exchange you make a set of ornaments and leave with a mixed bag of ornaments. Not only do you get new items to 'spruce' up your Christmas tree, you have a happy reminder of the exchange and the friend who took the time to make your little decoration!

After hours of surfing the interwebs looking for the 'perfect' tutorial or idea I finally decided on an applique sewing project I fell in love with. With total due credit to Pilli Pilli for dreaming up these cuties I set out to make my own. I ordered the teeny tiny hoops online (hoping they'd arrive in plenty of time to finish!), had a scrap of linen on hand for the 'canvas' and bought 1/4 yard pieces of little prints in reds and greens. There's always plenty of ribbon, floss and needles here so all I had to do was figure out how to make them!

A bit of trial and error taught me that using a fusable backing for the little shapes would minimize fraying and keep them in place for sewing. I cut each piece free-hand so no two were alike (mostly because I had no pattern and besides, part of their charm is their 'rough' look). I cut 4 inch by 4 inch squares of linen and ironed on the bitty shapes then headed for my Curvy (aka sewing machine). Never having used a machine for free-form/curved sewing I wasn't sure what I'd end up with but it turned out to be easy enough (and the small size made pulling out wonky stitches and trying again easy too!). Next, I fitted the linen piece into the hoop all nice and snug and hand stitched the details. I added little snow flakes to the backgrounds (but they didn't show up too well).  I cut circles from scrapbook paper for a backing, tied a pretty bow around the tension screw and added a silver thread hanger. Then I did it all 11 more times!

I made 6 with happy little trees..


And 6 with happy little snowmen...


And packaged them up up to share!


 I'm already thinking about next year!

Monday, November 21, 2011

Monkey Business!

As I mentioned in my last post I made sock monkeys for Craft Hope's latest project.  A couple of friends came over with their socks and sewing equipment and we made monkeys!  My friend H was the go-to for instructions since she'd already started some (and is an expert sewess - is that a word?).   No pattern needed really and once you make one and find out how fun and easy they are you want to make a whole zoo.  Well, I only made two, but I had a tight deadline to meet!  Not surprisingly my 4 year old apprentice wanted the monkey to be a pirate, but brown monkey wasn't wearing the pirate gear too well.  So I picked up a pair of stripey socks and made Cap'n Monkey.


The extra fabric from the toe of the sock made a nice little kerchief.


He looks sea worthy, eh matey?

But what to do with brown monkey?  A girlie one perhaps?  When else am I going to use a piece of pink tulle after all?  A quick no-sew tutu and some felt flowers and brown monkey became ballerina monkey - and pirate monkey had a date!


They are now nestled snug in a box on a flight to Texas.  Bon voyage monkeys!  I hope whomever they go to live with has as much fun snuggling them as I had making them!

Pin It

Friday, November 11, 2011

Stocking Up

Somewhere along the line in my cruising of the interwebs I found Craft Hope, a site where crafters can share handmade crafts with those who need them.  I started with Project 9 making pillow cases for ConKerr Cancer, an organization that provides cheerful pillowcases to sick children in hospitals across the country.  I jumped back in this year with Project 14: Christmas in Dixie.  It is for an organization in Alabama collecting Christmas stockings and decorations to those who lost everything in tornadoes last fall.  In both cases I donated directly rather than as part of Craft Hope since they have their own collection deadlines (that I missed).  But whether you craft along with the Craft Hope timelines or refer to their charities list for ideas that suit your crafty talents, it's a great way to connect and contribute. 


Since I had a lot of green felt left over from a previous project, I just found a simple stocking shape pattern and decorated as I went.  I originally intended to sew the stocking seams on my machine but I ended up doing all the edges by hand.  I used both glue and sewing to attach the embellishments even though gluing makes me feel like I'm cheating somehow.  :-)

The next project (#15) is Sock Monkeys for Texas - they will go to children who lost their homes in Texas wildfires.  The deadline is November 24th so I need to get moving!  If you are interested in joining in, all the details are here.

Friday, October 21, 2011

Fall In The Bathroom

We've been caught up in Halloween around our house, but today I took a few minutes (seriously, like 5 mins) to bring back a favorite from last year.  It's quick and easy and cheap...even cheaper this year since I just rebuilt with the same materials from last season.


Here's all you need to make fall toilet paper cozies of your own...


  • Roll of toilet paper
  • Plastic bag
  • Fat quarter or similar sized piece of fabric
  • Piece of a stick (or brown paper)
  • Ribbon

Start by laying out your fabric wrong side up and set your TP roll in the center.


Loosely roll the plastic bag lengthwise and wrap it around the middle of your TP roll.  The bag will add some 'body' to your finished pumpkin shape.


Starting with the short sides (if your fabric is not a square) pull the edges up to the top of the TP roll and stuff into the center tube.  Next take a corner of the fabric and pull it up and stuff it into the tube.  Continue pulling the fabric up and tucking it in adjusting to create 'pleats' along the sides.


Once you've wrapped the paper roll you should have a pumpkiny shape.


Now all you need is a stem.  I used a  piece of a stick but a piece of paper rolled up would certainly be a fine substitute.  Add a coordinating ribbon and you have pretty fall TP storage for your powder room!


I made a set of three for a counter display.  Seasonal and sensible storage!
Pin It

Friday, September 9, 2011

Fleur de Felt

When I took on the mission of creating center pieces for a baby shower (yes the same baby I've blogged about before - we're all so excited!) all I knew was there would be felt involved.  Flowers, pretty and girlie colors and perhaps buckets of some sort crossed my mind and then my idea really blossomed (groan).   I rummaged through the garage and found a roll of rubber covered wire.  I bought it in the Target dollar section a year or two ago expecting to use it for its intended purpose as garden tie wire.  Better use: faux-felt-flowers! 


The buckets are from Hobby Lobby (on sale even!)  Again I raided my various stashes and found some floral foam.  I cut chunks with a serrated knife and stuffed them into the buckets.  


I used my die cutter to cut out several flower shapes, some circles for centers, and some leaves.  I also dug out some small styrofoam balls and cut them in half, then wet felted them to make a few "3-D" centers.  Next step was a lot of mixing and matching and gluing.  Yes, gluing.  GlueCatGlue for this project.


Once flowers were glued to wire stems and leaves were added I worked out my color combinations to balance as best I could among the buckets.  A bit of a bend here and there and then I stuck the stems into the floral foam.   Some shredded paper fake grass finished them off.


Though I feel like I cheated by gluing, boy howdy that sure makes things faster and easier!  G suggested a Halloween version in black felt with missing petals.   I'm sure Jack Skellington would appreciate them.

Saturday, August 6, 2011

Love This Thingie!

Yesterday I met the cutest little sewing thingie!  My Dad made it for his wife who is a quilter and while I'm not sure if there's an official name for such a thingie, it sure is a cute thingie!  A functional thingie and an organizational thingie to boot!


The vertical piece has two spaces for scissors, needles, tweezers, a needle threader - any longish-smallish sewing item - and the peg keeps a spool of thread handy.  The horizontal base has a little magnet built in for pins or needles on top and a lucky penny embedded below!


What a nifty sewing station?  Isn't it a cute little thingie!?

Sunday, July 10, 2011

My New Favorite Thing I've Made

When the idea for creating the baby nursery was launched I grabbed "mobile" from the to-do list.  I wasn't sure what I'd end up with but knew I wanted to give it a whirl.  The wall decal for the room was a perfect 'pattern' for a set of cute little felt creatures so I started there.  I started with the little bird since I have a die cut that shape (is that cheating?)  I added a pointed oval shape to make a tummy so he would have a little more dimension.


After that I had to make up patterns myself.  Next up was the squirrel.  I enlarged a print out of the actual decal to get the body and tail shapes.  He didn't look right being a side view so I added paws on the right to balance him out.  Simple french knots for eyes and a tiny brown circle for a nose made his face.  I lengthened the tail to attach it to his back side and again added a little pointed oval to allow for some stuffing.


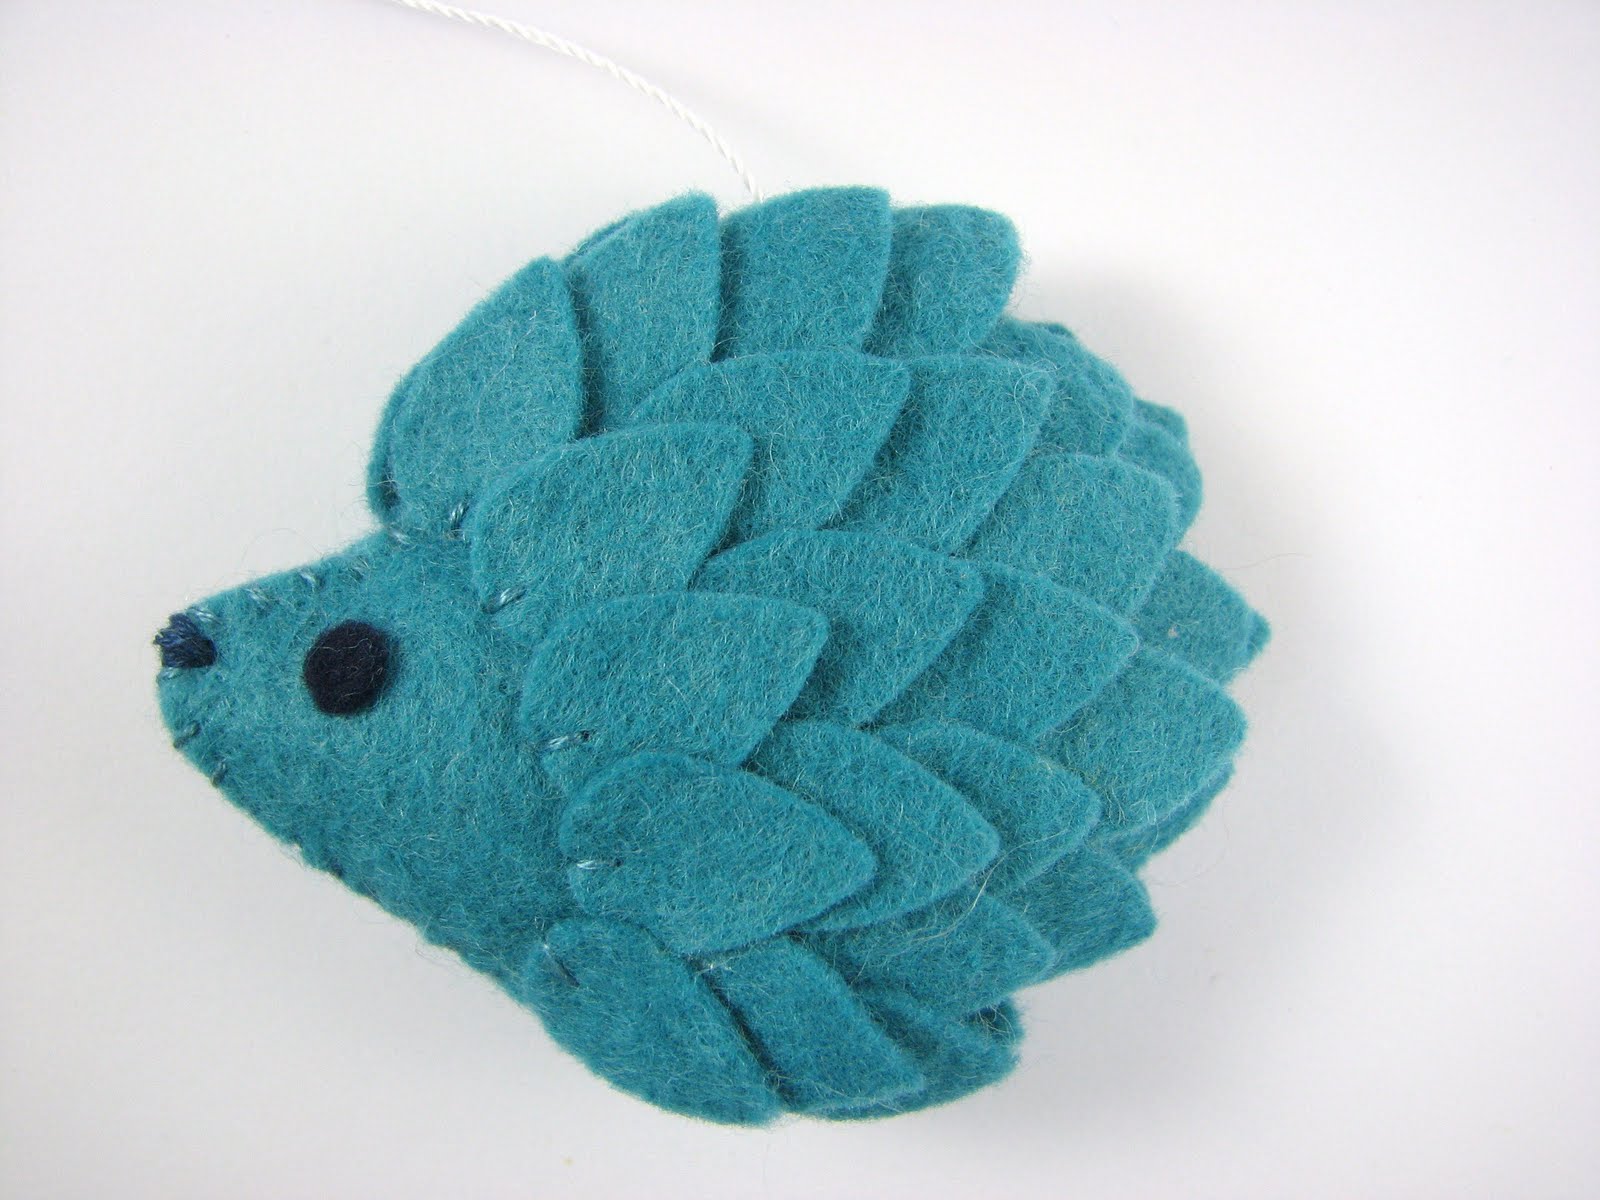
The hedgehog may be my favorite - he was created from a simple body shape and a lot of little die cut leaf shapes.  I sewed the 'leaves' by his face then glued rows along the rest of his body.  I sewed his sides together, added stuffing, eyes and a little nose and a hedgehog was born!


Hmmm, maybe the owl is my favorite?  This guy was made with the basic shape from the decal, a lighter colored tummy sewn on and then the face, feet and wing shapes glued on.  I've really never been a 'gluer' with my felt, but I tried stitching around the small pieces and it just looked messy.


I thought I needed an odd number for the mobile balance so had to decide on critter #5.  I tried a bunny but the scale was off with the ears on a like sized body.  I settled on a butterfly when I realized I should be thinking in terms of what color would mix well.  That lead to green as a nice balancer and of course...a froggie!  I found a basic shape online that I modified to better match the existing fellas.  Again I sewed on the belly, added the back and a little oval for stuffing room.  I always added the faces last since the change in dimension after stuff would have moved the positioning.


Now that the forest friends were complete it was time to figure out how the heck to make them into a mobile!  I purchased pink plastic embroidery hoops in 8 in and 6 in sizes but later decided a natural wood would look better and more like the tree in the decal.  I spent quite a while trying to determine the best balance of colors and critters until I settled on four hanging around the circle and one in the center.  Each of the animal had a flower for balance as well...


I measured the four cross points of each hoop and drilled 1/8 holes at each point.  I then painted the hoops brown (3 coats) and added a coat of Mod Podge for a more finished look.  The owl and bird were above their flowers (to put them in the 'sky') so I sewed the flower onto white jewelry string then using a large upholstery needle I threaded on the animal.  I looped the string through a hole in the larger hoop, then looped it through the smaller and left lots of extra in case I needed it!  Similarly, for the frog and squirrel I threaded the animals then sewed on the flower shape and threaded through the hoops.  Once everyone was in place I adjusted the heights so it all hung straight and balanced.  To finish it off, I added little leaves to cover the strings on the larger (bottom) hoop and tiny flowers to cover the strings on the smaller (top) hoop.  The hedgehog got center stage with just a long string gathered into the other four at the top.  I tied all the strings to a D-ring and covered it with one final felt flower.  A ribbon looped onto the D-ring for hanging and ta-da...custom baby mobile!


What fun it is to envision something and make it come to life!

Tuesday, July 5, 2011

Super Secret Stuff!

Our friend is having a baby girl (ETA August 12)  and now she has a super sweet room  to come home to!  About a dozen friends all bought or made something to add to this special space and while the mama was away on a weekend vacation we put it all together.

One of the starting points was this pretty crib set from Pottery Barn.  Girly, pinky, happy, flowery!


Inspiration also came from this happy, whimsical wall decal set.  Perfect colors to make the soft green room cheery and girly!  (I made the mobile...more on that in other post).


All the details were so fun...the lamp and nightlight made with flowers from a Pottery Barn sheet for a perfect match, a sweet framed 'family' picture, flowers added to the cabinet and some felt flower embellishments on the airy pink sheers for another lady-like touch.


The closet is now fru-fru-functional (a new decorating term) - hooks, bins, organizational labels and lots and lots of adorable little bitty girly dresses!


 The changing area is now all set with cuteness and organization...


Another view here showing how well all the pieces came together...


This room came out so special and lovely!  So many good friends adding their time, creativity, repurposed items and most especially LOVE to make a wonderful space for a great lady and her little miracle girl!